Sunday, November 5, 2017

Simulating Fetch Robotics Freight with Steam Controller Teleop


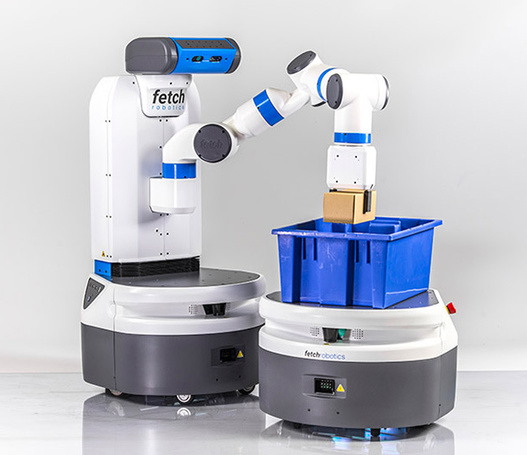
Hunter College owns Freight and Fetch robots.  I was asked to help figure out how to reduce the speed of the joystick teleop input for the Freight robot.  The catch is, I don't have physical access to either the robot or the joystick it ships with.  Instead, I had to simulate the robot and attempt to control it using the only joystick I have on hand: a Steam controller.

Having never dealt with ROS or robots in general, this was the start of a journey. The documentation for fetch_teleop is pretty non-existent, so this article documents what I did and will hopefully serve as a reference for someone else who wants to do something similar.  

Installing ROS

I used a Macbook Pro on OS X El Capitan.  ROS doesn't officially support OS X, though there are guides for compiling ROS for OS X.  That process seems pretty hairy, so I decided instead to use an Ubuntu VM on VirtualBox.

The Fetch manual is a great resource and I followed the tutorial on Gazebo simulation.  It calls for an older version of ROS, ROS Indigo running on Ubuntu 14.04.  

Follow this guide to install ROS indigo.

Install Gazebo and Fetch Robotics simulation

Install gazebo (per guide):
curl -ssL http://get.gazebosim.org | sh
Then, install the fetch gazebo simulation:
sudo apt-get update
sudo apt-get install ros-indigo-fetch-gazebo-demo

Install Steam Controller drivers for Ubuntu

SC Controller is a great project which provides a driver for and allows you to use your Steam Controller outside of Steam.  To install:

wget -nv https://download.opensuse.org/repositories/home:kozec/xUbuntu_14.04/Release.key -O Release.key sudo apt-key add - < Release.key 
sh -c "echo 'deb http://download.opensuse.org/repositories/home:/kozec/xUbuntu_14.04/ /' > /etc/apt/sources.list.d/sc-controller.list"
sudo apt-get update 
sudo apt-get install sc-controller

After installing, restart your VM.  Your Steam controller should show up as jsX, where X is the index number of the joystick under /dev/input.  That means /dev/input/js0 if you have no existing joysticks, and js2 for me since I have virtualbox guest additions as /dev/input/js0 and /dev/input/js1.  You can test that the joystick is working using joytest:

sudo jstest /dev/input/jsX


Install Joy and fetch_teleop

Next, we need to install the joy and fetch_teleop packages.  fetch_teleop maps joystick input to control signals for the robot.  fetch_teleop subscribes to the /joy topic, which is published by joy.  joy publishes the state of a Linux joystick.

sudo apt-get install ros-indigo-joy ros-indigo-fetch-teleop

Run Simulation


Now we're ready to start the simulation!

Launch the master node and playground:

roslaunch fetch_gazebo playground.launch robot:=freight

If you'd like, to play around, you can use your keyboard to control the robot.  In a new terminal, run:

rosrun teleop_twist_keyboard teleop_twist_keyboard.py

Next, we need to start the Joy node and tell it which controller to use.  Remember jsX from earlier.   In a new terminal:

rosparam set joy_node/dev "/dev/input/js2"
rosrun joy joy_node

To test that joy is publishing messages, we can echo the /joy topic in a new terminal:

rostopic echo joy

You should see output like this when you move the joystick:

---
header: 
  seq: 9847
  stamp: 
    secs: 312
    nsecs: 756000000
  frame_id: ''
axes: [-0.0, -0.0, 1.0, -0.0, -0.0, 1.0, -0.0, -0.0]
buttons: [0, 0, 0, 0, 0, 0, 0, 0, 0, 0, 0]
---

Configure and launch fetch_teleop

The Fetch & Freight manual doesn't mention how to configure the speed/acceleration when using Fetch Robotics' bundled joystick. This is mostly what I discovered from reading the source of fetch_teleop.

fetch_teleop gets parameters from the parameter server under the following namespace:

/teleop/{component}/{parameter}

There are 5 components, each of which have their own params:

torso
gripper
arm
head
base

Since I'm simulating the Freight robot, which doesn't have an arm, head, or torso, we only care about moving the base.  For my Steam Controller I had to remap the inputs for deadman from the default of button 3 to button 0 (the A button) and axes from w=3 and x=0 to w=1 and x=0 (the left joystick) like so:

rosparam set teleop/base/button_deadman 0
rosparam set teleop/base/axis_x 0
rosparam set teleop/base/axis_w 1

Then, we can change the maximum velocity and acceleration along the w and x axes:

rosparam set teleop/base/max_windup_time 0.25
rosparam set teleop/base/max_acc_x 0.5
rosparam set teleop/base/max_acc_w 1.5
rosparam set teleop/base/max_vel_x 1.0
rosparam set teleop/base/max_vel_w 1.5

And finally, run fetch_teleop in a new terminal:

rosrun fetch_teleop joystick_teleop

You should now be able to steer the robot.  Be sure to hold down the deadman, or else your input will be ignored!

Sunday, March 22, 2015

Implementing "run on login" for your (node-webkit) app in OS X


I spent a good chunk of today trying to figure out how to implement a "run on login" option for my pet project, sleep.  It's a little node-webkit application with a toolbar/statusbar tray icon UI which attempts to answer the age-old question of "ugh, when did I fall asleep last night?" by telling you when your MacBook went to sleep, presumably because you closed the lid, or because it was idle for a while.  As a person who often finds myself waking up with my face planted in my laptop or with my laptop on my chest, lid closed, this is handy for determining whether or not I got enough sleep the night before.

A quick Google search reveals some ways to achieve this with the Cocoa framework.  One of the answers to a StackOverflow thread (incidentally authored by the then-lead-developer of Growl) talks about using the LSSharedFileList API.

Not wishing to wrap a Cocoa API, I found an easier solution: using launchd / launchctl.  It turns out, you can easily create a launchd LaunchAgent which will run your app when the user logs in.  I was pleasantly surprised that launch jobs can be created by a user, rather than requiring root.  I haven't run into any permissions issues yet.

our gameplan

On a high level, here's our approach:

  1. Write a simple launchd job, which comes in the form of a .plist (XML) file. 
  2. Then, run some command line arguments to move it to ~/Library/LaunchAgents/, and use launchctl to "load" the job.  
  3. (optionally) We can easily disable the job by running `launchctl unload` at a later point.  
  4. (optionally) We can also check to see if our job is currently active by doing `launchctl list` and grep-ing our job name (technically, we see if it's "loaded", which doesn't necessarily mean it's not disabled, but for our purposes).

let's write some XML (it won't hurt, I promise)

It's always lovely to find a website dedicated to explaining and documenting things for developers like strftime.org, a site dedicated simply to presenting a table of Python's strftime placeholders. I was thrilled to come across this super helpful guide to launchd.  Skimming through quickly, we learn what launchd is, what a daemon and agent are, and that all we need is a file as simple as this:


defining a launchd job

First, we need to give our job a label.  According to the guide, the convention is to use reverse domain notation, so I'm using "com.capablemonkey.sleepApp".   I've chosen my handle as the 'vendor' name which typically follows the domain ('com' in this case).  sleepApp is the name of my application.

Next, we'll describe the program to be run.  In my case, I want to run a .app package, so I'll be using the nifty `open` OS X command which knows how to execute .app packages.  To set this in our config file, we'll specify a new field called ProgramArguments which is an array of strings: the command/program, followed by any arguments.  The last argument is the location of the .app package: /Applications/sleep.app.

Lastly, we'll include the RunAtLoad flag which will cause the job to be "run" when it's "loaded" (a job can be loaded, but not run immediately).

putting things in motion

'enabling' the job

Now that we've described the job, we need to place the file in ~/Library/LaunchAgents in order for the job to be run when the user logs in:

cp com.capablemonkey.sleepApp.plist ~/Library/LaunchAgents/

Then, we'll ask launchctl to load the job:

launchctl load ~/Library/LaunchAgents/com.capablemonkey.sleepApp.plist

In my node-webkit app, I can accomplish this by running those commands with `child_process.exec`:


disabling the job

Should the user decide to disable running on login, our application can do:

launchctl unload ~/Library/LaunchAgents/com.capablemonkey.sleepApp.plist


checking to see if job is enabled

Our application can check to see if running on login is enabled:

launchctl list | grep com.capablemonkey.sleepApp


grep will return an error code of 1 and stdout will be empty if the job is not loaded.  Otherwise, we'll see our job and some information in stdout.

that's all, folks!

Pretty straightforward stuff.  Not sure if this is the best way to accomplish this, but it works well.  I didn't find any good resources on programmatically implementing "run on login", short of asking the user to add the app to their Login Items list or writing an AppleScript that does that.  Hope this comes in handy for someone!

Saturday, March 29, 2014

Leveraging Dwolla OAuth for User Authentication

Dwolla Forms, a Dwolla Labs project, uses Dwolla’s OAuth API to authenticate users rather than the standard email / password login scheme most web applications use today. Your app can too!

By relying on a third party like Dwolla to authenticate your users, you outsource the responsibility of username and password storage, retrieval, and verification. This lets you leverage all the hard work we’ve put into building a secure login system, for free! Of course, relying on a third party requires trust and faith in the accuracy and security of this third party authority. Rest assured, we’ve got our data locked down. (read more about security at Dwolla)

By lowering the amount of sensitive information you hold, you become a less tasty target for attackers. As another consequence, you’ll save your users from having to remember yet another username and password combination.

Overview

We can implement authentication via Dwolla OAuth in three easy steps:

  1. Obtain authorization to access a Dwolla user’s account information via OAuth
  2. Retrieve the user’s unique Dwolla ID using the Dwolla REST API’s Account Information endpoint
  3. Authenticate the user based on their Dwolla ID.

When a user signs up via OAuth for the first time, we retrieve and store their Dwolla ID with their user data. In the future, when that user attempts to sign in again, we point them to OAuth with Dwolla, and then we ask, in effect, “Hey Dwolla, what’s the Dwolla ID of the user I just redirected to you?” From there, we look up the corresponding user by their Dwolla ID and generate a login session for them.

Sample code!

Let’s look at how that works with some sample Node.js code. We’re using the express.js web application framework and nanek's node-dwolla package.

First, we’ll start off by creating a route which initiating OAuth:
    app.get('/auth/dwolla', function(req, res) {
      var authUrl = Dwolla.authUrl(redirectUri, "AccountInfoFull");
      return res.redirect(authUrl);
    })
After the user logs in and authorizes our Application, they’ll be returned to /auth/return, which is handled here:
    app.get('/auth/return', function(req, res) {
    var code = req.query['code'];
    $.waterfall(
      [
        // Exchange code for token
        function(callback) {
          Dwolla.requestToken(code, redirectUri, callback);
        }
        // Get user info
        , function(token, callback) {
          Dwolla.setToken(token);
          Dwolla.fullAccountInfo(function(err, user) {
            if(err) { return callback(err); }
            return callback(null, user);
          });
        }
        // If user is new, create a new user with Name and Dwolla ID returned by fullAccountInfo
        // otherwise, if they already exist, return the existing user object.
        , function(user, callback) {
          db.User
            .findOrCreate(
              {
                dwolla_id: user['Id']
              }
              , {
                name: user['Name']
                , dwolla_id: user['Id']
              }
            )
            .complete(function(err, user) {
              if(err) { return callback(err); }

              // log user in:
              req.session._user = user;
              return callback(null, user);
              }
            })
        }
      ]
      , function(err, results) {
        if(err) {
          return res.send('oh no!');
        }
        return res.render('nextpage');
      }
    )
  })
In this route, we first extract the verification code we get upon user redirect and exchange it for an OAuth token, thus completing the OAuth process. Then, we retrieve the user’s Dwolla account information with Dwolla.fullAccountInfo().

From the user object we get back, we’ll find an existing user account based on the user’s Dwolla ID, or create a new one, with the given user’s name and Dwolla ID. Finally, we’ll log the user in by attaching their user object to the current session and send them off to the next page.

Tuesday, March 25, 2014

Do the weaknesses of SHA-1 weaken the security of Dwolla’s API?

I'd like to share our answer to an interesting question regarding SHA-1 and the authentication scheme implemented by Dwolla's Off-Site Gateway Submit Directly flow:
"I'm looking at the developer stuff on checkout workflow, and see that the "signature" being transmitted between Dwolla and a business website is specified to use the SHA1 hash system. It is my understanding that that method is becoming vulnerable to an attack that has adequate computing power behind it. So, what other hash methods are allowable, for a business interacting with Dwolla? Thanks in advance!"
Though there are some weaknesses with SHA-1, they relate only to hash collisions. This means the weaknesses aren't helpful to attackers who are trying to determine the underlying input(s) of the hash. The only way to obtain the input(s) is by brute force.
In our case, the input of the signature hash is a concatenation of the Application Key, timestamp, and OrderID. These are all provided in the checkout form, so the attacker knows what the input is. What the attacker doesn't have is the Application Secret, which is a 50 character string used as the key in this key-based hash.
In order to forge a signature, the attacker would need to obtain the App Secret by way of brute force. If we assume the search space per character is all alphanumeric characters and 3 symbols ("+", "/", and "="), that leaves us with 65 possible characters. Since the secret is 50 characters long, we can say that an attacker would need to make
or
attempts to exhaust all possibilities.

Let's say an attacker can hash 10 million candidates per second on a single CPU. To exhaust all possibilities, it would take roughly:

Even if he has a large farm of machines running, say 1000 machines, with a collective power of 10 billion hashes/sec, it'd still take roughly:

The sheer size of the Secret string renders brute force an infeasible way to obtain it.  I would recommend reading Jeff Atwood's write up about hashes.

Sunday, March 16, 2014

Spotflux doesn't play nice with Tunnelblick

I recently gave Spotflux, a free VPN tunneling service, a try on my Mac.  I loved the experience -- extremely high speed and unlimited bandwidth, but I noticed that I could no longer use my beloved Tunnelblick VPN client.  When attempting to connect to a network with Tunnelblick, it errored out:

  openvpnstart returned with status #226

and left this in the log:

*Tunnelblick: openvpnstart log:
 Loading tun-signed.kext
 stderr from kextload: /Applications/Tunnelblick.app/Contents/Resources/tun-signed.kext failed to load - (libkern/kext) kext (kmod) start/stop routine failed; check the system/kernel logs for errors or try kextutil(8).
 stderr from kextload: /Applications/Tunnelblick.app/Contents/Resources/tun-signed.kext failed to load - (libkern/kext) kext (kmod) start/stop routine failed; check the system/kernel logs for errors or try kextutil(8).
 stderr from kextload: /Applications/Tunnelblick.app/Contents/Resources/tun-signed.kext failed to load - (libkern/kext) kext (kmod) start/stop routine failed; check the system/kernel logs for errors or try kextutil(8).
 stderr from kextload: /Applications/Tunnelblick.app/Contents/Resources/tun-signed.kext failed to load - (libkern/kext) kext (kmod) start/stop routine failed; check the system/kernel logs for errors or try kextutil(8).
 stderr from kextload: /Applications/Tunnelblick.app/Contents/Resources/tun-signed.kext failed to load - (libkern/kext) kext (kmod) start/stop routine failed; check the system/kernel logs for errors or try kextutil(8).
 Error: Unable to load net.tunnelblick.tun and/or net.tunnelblick.tap kexts in 5 tries. Status = 71

Apparently, the kext (driver) that Spotflux loads is incompatible with Tunnelblick and prevents Tunnelblick from loading its own kext. The solution is to unload Spotflux's kext and try connecting via Tunnelblick again.

Let's first run kextstat in Terminal to ensure we've got the offending kext loaded:
 
kextstat | grep spotflux
  121    0 0xffffff7f82231000 0x6000     0x6000     com.spotflux.Spotflux.tun

Then, let's unload it via kextunload.  This requires sudo.

sudo kextunload -b com.spotflux.Spotflux.tun

Once unloaded, Tunnelblick will be able to load its kext and connect as usual!  This will need to be done every time Spotflux is launched and you wish to use Tunnelblick afterwards, unfortunately.

Saturday, January 25, 2014

Graph Search: Facebook is Finally Useful

Facebook's Graph Search feature is amazing. I wanted to know which of my new acquaintances and friends from high school go to the university I'll be visiting for a hackathon next week. So, I just started typing my query in a natural way, "my friends who go to Carnegie Melon University", and bam -- I got exactly what I was looking for. No fumbling with drop down menu filters or long advanced search forms. It's like Wolfram Alpha for your intricate network of friends, family and acquaintances.


Of course, not everyone feels the same way about this feature.  Moreover, not everyone feels the same way about Facebook itself.  There's the highly debated issue of users being overly reliant on the online platform, to the point where it's unhealthy.  Critics of Facebook mock it as a tool for narcissists who couldn't care to remember who their friends are.

While I'm cautious of Facebook's potential to be used in a socially unhealthy way, I'm a firm believer that the data amassed by the network can be used to improve social life off the web.  I've made many acquaintances who I haven't yet had the luxury of learning everything about them.  I will probably remember them and the moments we shared together, but easily forget their name and the school they go to or their hometown. Facebook solves this problem.


However, the fact that Facebook wields so much power, that it single-handedly controls personal, and sometimes private information about nearly everyone, coupled with the perceived lack of transparency about what Facebook does with that data gives rise to the suspicion that they may have a nefarious agenda --  they may be exploiting this data by selling it to nosy corporations or giving direct access to snooping intelligence agencies like the NSA.  

By building Graph Search, Facebook has given me a reason to believe that the data it amassed doesn't have to be used for "evil" -- it can be used for good. Its collection, aggregation, and analysis of social data undoubtedly comes at the cost of privacy, but the insights gained are powerful and beneficial.

At the end of the day, Facebook is solving a complex problem: digesting the massive amount of data submitted voluntarily by hundreds of millions of people around the world, and making it useful.  They've done just that with Graph Search.

Thursday, November 21, 2013

Morpheus

The following is an excerpt from my blog post in the Dwolla Blog where I recounted my experience at the largest hackathon in Texas, HackTX.
A screenshot from Morpheus.
Morpheus, whose name bears no relation to the well known leader in the human fight against dystopian robot overlords from The Matrix, but instead is named after the Greek god of dreams and sleep, is a platform that brings distributed computing to mobile devices.  Mobile devices, such as Apple and Android smartphones and tablets, are exponentially increasing in processing power.  If we consider the fact that in my pocket lies an HTC One which contains a 1.7 GHz quad-core Snapdragon processor, (which truly is mind-blowing, because the last time I shopped for computer components, a few years ago, Intel was just rolling out their first Quad Core processors and the world was going nuts over it) and we also consider that 80% of the time, my phone is resting idly in my pocket or missing underneath my bed, we realize that the true potential of its is being wasted 90% of the time.  The other 10% is wasted because I use my phone to check my Facebook news feed and text my buddies.  Now, imagine if your phone could instead be used to work in a cluster of other computing devices to tackle large computational problems, like those being solved by Folding@Home, a project that takes advantage of the powerful Playstation 3's gamers have sitting in their homes to simulate protein folding, design medical drugs, and understand molecular dynamics to save human lives.  The true power of Morpheus is realized when you consider that smartphones and tablets are growing in their ubiquity.  Think about the impact that billions of super-quick devices could have if they were used for a purpose greater than taking selfies and tweeting about what you're about to buy from the supermarket.

"But do you really think people will drain their battery just because of the philanthropic goodness of their hearts?"  you may be inclined to ask.  Morpheus answers this in two ways: a) participants only leave their phone to compute when charging at night, and b) researchers will pay participants, using Dwolla, for the work their phone does.  This brings an interesting twist to the Folding @ Home model, which relies on gamers to rack up their energy bill and subject their PS3 to computational slavery for nothing except the knowledge that they're doing good in this world.  With Morpheus, researchers and even commercial enterprises can leverage the immense power hidden away in everyone's pockets to solve their problems.  Imagine IBM renting your phone for the night so it can compute the Answer to Life, The Universe, and Everything in just a fraction of the 7.5 million years it took Deep Thought to do so.
The Morpheus team!
The Morpheus team! 
So, in essence, you get paid while you sleep just for running a simple app on your phone during the night. This simple idea is mind-bogglingly cool and has a ton of potential to do good for the world. I'm hopeful that the Morpheus team, uTexas students Eduardo Saenz, Bulat Bazarbayev, Comyar Zaheri Brandon Lee, and Sudheesh Katkam, will take this beyond HackTX and launch this in the wild, real world. Very well done, gentlemen.

Monday, June 25, 2012

Python: Glide, instead of move, mouse cursor from one point to another

I couldn't find a function in pywin32 to smoothly glide a pointer from one point to another, instead of simply "moving" the cursor by making it jump from its current position to a given position.  I needed a way to make the mouse sort of "glide" from point A to point B at a seemingly natural pace, so here's my solution:

import time
import win32api

MOUSE_SPEED = .4 #seconds

def mouse_glide_to(x,y):
    """Smooth glides mouse from current position to point x,y with default timing and speed"""
    x1,y1 = win32api.GetCursorPos()
    smooth_glide_mouse(x1,y1, x, y, MOUSE_SPEED)

def smooth_glide_mouse(x1,y1,x2,y2, t, intervals):
    """Smoothly glides mouse from x1,y1, to x2,y2 in time t using intervals amount of intervals"""
    distance_x = x2-x1
    distance_y = y2-y1
    for n in range(0, intervals+1):
        move_mouse(x1 + n * (distance_x/intervals), y1 + n * (distance_y/intervals))
        time.sleep(t*1.0/intervals)

def move_mouse(x, y):
    win32api.SetCursorPos((x,y))
mouse_glide_to(x,y) will move the cursor from its current position to point (x,y) in MOUSE_SPEED seconds. It works perfectly!

Saturday, June 23, 2012

Road Runner (SMC Networks) routers - practically NO security


Upon registering for Time Warner's Road Runner internet service, customers are offered a router manufactured by SMC Networks.  The router ships with WEP encryption enabled by default, using a 128-bit key based on its MAC address.   While WEP encryption is already the most insecure form of wireless encryption out there,  SMC Networks amplifies this weakness further by not generating a random WEP key; something which a home user almost never changes unless forced to do so during first time installation, whether it is because he or she is ignorant about the risks of a vulnerable network, or because he or she simply doesn't know how to or care enough to change it.  While a randomly generated WEP key can be defeated just as easily as any other, the default encryption key for these routers is trivial and can be determined just by spotting it in a regular AP (Access Point) scan of the area.

The encryption key can be discovered in seconds, without the need for conventional wireless cracking tools such as the aircrack-ng suite. These routers effectively have no security whatsoever, as even the most tech-challenged of computer users can break into them.  From there, the users of the network are vulnerable to all kinds of harm, ranging from innocent piggy-backing to malware and identity theft.


In under a minute, one can find the key using only the router's wireless network name (SSID) and its wireless MAC address (BSSID).  These routers stick out like a sore thumb because their SSIDs are simply 4 hex characters (e.g. 'D78A') and their MAC addresses typically begin with 00:26:F3, 00:22:2D, or 78:CD:8E (OUI). 


Here's how:

In this example, let's assume we see a router whose SSID is '4B5F' and whose wireless MAC address is 00:26:F3:73:4B:52. The WEP key is generated in this format:

[first 10 characters of MAC] + [last two characters of SSID] + 14 0's

Following this format, we take the first 10 hex digits (or first 5 octets) of the MAC address, which we can easily find when performing a normal everyday wireless scan in Windows or OS X: "00:26:F3:73:4B", append the last two digits of the SSID: "5F", and tack on 14 0's to form the router's 128-bit encryption key:

00:26:F3:73:4B:5F:00:00:00:00:00:00:00

Knowing this, any joe-shmo can "hack" into an Road Runner SMC-Networks router with just a smartphone and optionally a pen and paper.  I would highly recommend that either SMC Networks or Road Runner move on to WPA2 encryption in their new routers and attempt to update these routers to use WPA2.  New Verizon FiOS Actiontec routers come factory default with WPA2 enabled with a randomly generated 32 character string and WPS disabled; they could learn something from Verizon!


EDIT: Apparently, the insecurity of these routers was already covered in an article from 2009; it's sad to see nothing has been done about it since then!  
"However, the Time Warner devices come pre-configured and locked, with URL blocking being the only feature available to the customer through the web administration interface."
According to the article, the router's web administration is locked and the home user cannot change the encryption scheme nor the encryption key, even if he or she wanted to.  This is definitely a huge issue.  

Python: Calculating the average color of an area of an image (PIL)

Here's a snippet of code I whipped up in Python to calculate the the average color of a square shaped area of an image.  I used the Python Imaging Library (PIL) to load the image, so be sure to have it available if you're using this.

import Image

def get_average_color((x,y), n, image):
    """ Returns a 3-tuple containing the RGB value of the average color of the
    given square bounded area of length = n whose origin (top left corner) 
    is (x, y) in the given image"""

    r, g, b = 0, 0, 0
    count = 0
    for s in range(x, x+n+1):
        for t in range(y, y+n+1):
            pixlr, pixlg, pixlb = image[s, t]
            r += pixlr
            g += pixlg
            b += pixlb
            count += 1
    return ((r/count), (g/count), (b/count))

image = Image.open('test.png').load()
r, g, b = get_average_color((24,290), 50, image)
print r,g,b

This is great for detecting the color of an area of an animated and constantly changing game screen, where finding the color of a single pixel may not be accurate enough for your needs.

Saturday, March 31, 2012

Simple Keylogger in VB .NET


This is a basic keylogger I wrote in VB.NET a few months ago.  It can be hidden by pressing the key combination CTRL+SHIFT+S (pressing it will toggle the display of the keylogger control panel), and has an inconspicuous process name "svchost.exe"  Upon exit, it will dump its keystroke log to C:\ntklr.sys and make the file hidden.  If you do not have permission to write to that directory, or would like to save the log using a different file name, you can select a different directory and path after checking the "Write to file?" checkbox.

This free, easy to use, and open source application does not raise any flags with popular anti-viruses as of right now, according to this report from VirusTotal, a service that scans a file through 40+ popular anti-virus products.  

To use, simply:
  1. Check the "Write to file?" checkbox and select a path (or use the default path), then click Open.
  2. Click the Start button to start keylogging.
  3. Press the key combination CTRL+SHIFT+S (all at once) to conceal the window.  ("stealth" mode)
  4. Press some keys, or wait for the victim to type something.
  5. Whenever you want, hit CTRL+SHIFT+S again to bring the window back and view the log.  Exit the application or hit End to make it write the log to the log file you specified.  
  6. Open the logfile to view keystrokes.  This file is hidden, so make sure you have Show hidden files enabled in Windows Explorer to find it.

Victim logs in
credentials captured ;)
If you would like to improve or modify this application, feel free to use the provided source code!  It requires the .NET Framework 4.0 redistributable package to be installed in order to run.

Binary (.exe): Download
.NET 4.0 redistributable package: Download
Source: GitHub repo

SomewhatSecureChat - Chat with another computer on your network!

This free, simple chat application that will allow you to securely chat with another computer on your LAN (on your local network, though it could work over the internet but not without some changes to account for NAT - like port fowarding).  It was written in VB .NET, so you'll need the .NET framework installed in order to use it.  Click here to download it.


Both parties will need to have this application running (and listening) in order to chat.   Simply agree on a mutual password and record your friend's listening port number and IP address, and you'll be chatting in no time!  Somewhat Secure Chat is only for Windows.  This easy to use application is free and open-source; feel free to improve and distribute this program!

Binary (.exe): Download
Required .NET framework 4.0 installer: Download
Source: GitHub Repo

Wednesday, October 19, 2011

Badass OUIs to use when spoofing your MAC address

When spoofing MAC addresses, I like to use OUIs from major defense companies to troll anyone that snoops around (and bothers to look it up).  Here's my list of awesome OUIs:


00-1A-11   (hex) Google Inc.
001A11     (base 16) Google Inc.
1600 Amphitheater Parkway
Mountain View CA 94043
UNITED STATES


00-00-8F   (hex) Raytheon
00008F     (base 16) Raytheon
M/S 1-1-1119
1001 Boston Post Rd
Marlboro MA 01752
UNITED STATES


00-0B-F3   (hex) BAE SYSTEMS
000BF3     (base 16) BAE SYSTEMS
6500 Tracor Lane
Austin Texas 78725
UNITED STATES


00-E0-AF   (hex) GENERAL DYNAMICS INFORMATION SYSTEMS
00E0AF     (base 16) GENERAL DYNAMICS INFORMATION SYSTEMS
COMPUTING DEVICES, LTD.
3190 FAIRVIEW PA
FALLS CHURCH VA 22042-4523
UNITED STATES


00-A0-21   (hex) General Dynamics
00A021     (base 16) General Dynamics
Communication Systems
77A Street
Needham Heights MA 02494-2892
UNITED STATES


00-26-89   (hex) General Dynamics Robotic Systems
002689     (base 16) General Dynamics Robotic Systems
1231 Tech Court
Westminster MD 21157
UNITED STATES


00-19-8A   (hex) Northrop Grumman Systems Corp.
00198A     (base 16) Northrop Grumman Systems Corp.
7055 Troy Hill Drive
Elkridge Maryland 21075
UNITED STATES


00-40-BE   (hex) BOEING DEFENSE & SPACE
0040BE     (base 16) BOEING DEFENSE & SPACE
P.O. BOX 3999
MAIL STOP 88-12
SEATTLE WA 98124-2499
UNITED STATES


60-8D-17   (hex) Sentrus Government Systems Division, Inc
608D17     (base 16) Sentrus Government Systems Division, Inc
141 Chesterfield Industrial Blvd
Chesterfield MO 63005-1219
UNITED STATES


00-07-EF   (hex) Lockheed Martin Tactical Systems
0007EF     (base 16) Lockheed Martin Tactical Systems
3333 Pilot Knob Road
Eagan MN 55121
UNITED STATES


00-08-55   (hex) NASA-Goddard Space Flight Center
000855     (base 16) NASA-Goddard Space Flight Center
Code 561
Greenbelt MD 20771
UNITED STATES


00-0E-96   (hex) Cubic Defense Applications, Inc.
000E96     (base 16) Cubic Defense Applications, Inc.
P.O. Box 85587
9333 Balboa Avenue
San Diego CA 92186-5587
UNITED STATES


00-14-8D   (hex) Cubic Defense Simulation Systems
00148D     (base 16) Cubic Defense Simulation Systems
2001 W. Oakridge Road
Orlando FL 32809
UNITED STATES


00-1F-0D   (hex) L3 Communications - Telemetry West
001F0D     (base 16) L3 Communications - Telemetry West
9020 Balboa Ave
San Diego CA 92123
UNITED STATES


EC-5C-69   (hex)   MITSUBISHI HEAVY INDUSTRIES MECHATRONICS
SYSTEMS,LTD.

EC5C69     (base 16)   MITSUBISHI HEAVY INDUSTRIES MECHATRONICS
SYSTEMS,LTD.

    1-16,5-CHOME,KOMATSU-DORI,
    KOBE HYOGO 652-0865
    JAPAN


00-00-AE   (hex) DASSAULT ELECTRONIQUE
0000AE     (base 16) DASSAULT ELECTRONIQUE
55, QUAI MARCEL DASSAULT
92214 ST CLOUD
FRANCE
FRANCE


00-00-AF   (hex) NUCLEAR DATA INSTRUMENTATION
0000AF     (base 16) NUCLEAR DATA INSTRUMENTATION
GOLF & MEACHAM ROADS
SCHAUMBERG IL 60196
UNITED STATES

Monday, October 10, 2011

WorldWinner Big Money Bot written in Python

What WW used to look like before GSN bought them.

I generally scored between 60,000-120,000 points on WorldWinner's Big Money compete-for-cash game, which, to me, was pretty good.  That was until I decided to looked up some strategies for improving my skill in BM and instead stumbled upon some YouTube videos of players scoring upwards of 350,000 points. My highest score was 137,582, and the highest I've ever seen in my experience was around 180k. You can imagine I was pretty shocked that a score higher than 200,000 was even possible, let alone achievable without cheating.


I then realized how much I suck at this game.  Well, what do you do when you can't beat a game?  Try, try again?  Practice?  Nope.  You cheat.


A simple Google search for "worldwinner big money bot" led me to one of those shady infomercial style sites with obviously fake and cheesy testimonials.  The product's slogan ended with "MAKE MORE MONEY THAN YOU COULD EVER IMAGINE!!!"  Riiiiiight.

Other than that shady site, I couldn't find any mention elsewhere of a bot for Big Money.  I decided to make my own.

It works, but it doesn't strategize, ponder, or think ahead yet; so it will usually end the game with a score between 60k - 120k.  I wrote this a while ago and I'm too busy at the moment to implement this feature.  If anybody would like to improve upon this, feel free.  Be warned, however: I didn't think I'd be sharing this so it's poorly commented.

To start, simply download the script here.  It was written for the latest version of Python 2, but any version > 2.5 should work fine IIRC.  It requires the Python Imaging Library (PIL) and Python for Windows Extensions (pywin32).


Before you can run it, you'll need to modify the script to set some variables.  You'll need to change variables 'xbeg' and 'ybeg' to fit your resolution and browser.  You can take a screenshot and measure the distance in MS Paint.  Use the picture below as a guide.


Here's a video of the bot in action:


Sunday, August 28, 2011

How to batch download all of your favorited tracks/music on 8tracks


Update: the script and method used in this post no longer works.  I made a GAE-hosted app version of this script instead; go to:  http://8trackshelper.appspot.com

I love 8tracks.  It lets me discover new music from a specific genre.  User generated playlists (mixes) are awesome because some people have great taste in music.  On that note, let me point out that the majority of these playlists aren't filled with that garbage mainstream hiphop they make these days (I know, right, what a relief).

Anyway, if you've used the site, you've probably favorited a couple of tracks that you liked and now have a long list of tracks on your profile.  Over a few months of listening to 8tracks, my favorite tracks list has accumulated about 200 tracks.  I've always wanted to download all of the songs on that list... but downloading them one by one would seriously be a pain, as you'd have to  find a reliable source, copy/paste, search, download, and rinse and repeat for each of those 200 songs.

Instead, I wanted to automate the process.  You can download music directly from 8tracks using a JS script written by Yamamaya, but only when you're playing a them from a mix.  That's a problem because there's no way to go from a favorited track on your list directly to the mix where it originates from in order to download it.  This means that you can't download the songs directly from 8tracks' servers, and you'll have to download them from somewhere else.

Problem is, there aren't many reliable sites or services to go to download MP3s quick and easy enough to automate the process.  Then, I discovered Grooveshark.  Grooveshark is a popular music streaming services that lets its users stream "any song in the world for free."  Pretty neat, eh?  Most of its content is user-uploaded, so song quality may vary (though, from what I've seen, they've always been > 128 kbps).

Grooveshark itself wasn't exactly the answer to my problem, it was a program called SciLor's grooveshark™.com Downloader, which was written by, you guessed it, a developer named SciLor.  It allows you to, among other things, batch search and then download songs from Grooveshark.  His program pretty much solves everything.  From here, all I needed to do was get my list of songs from 8tracks into plaintext with the artist name, and bam, and if everything runs smoothly I should have 200 MP3s without much effort.

To get my list of songs and respective artists in a list in plaintext,  I wrote a quick Python script to extract a user's favorited tracks when given their username.  It generates a list in the following format: <song title> - <artist>, and saves it to a text file.  All you need to do from here is copy the list into SciLor's grooveshark™.com Downloader and let it rip.  So let's go over this really quick:

Step 1
Make sure you have Python 2.7X (if not, download it here if you're using Windows).  Then, download the Python script here.  And finally, get the downloader here.

Step 2
Run 8tracks.py by either double clicking or running it from the command line (python 8tracks.py), input your username and in a few seconds, you should have your list of favorited tracks in a text file.


Step 3
If you haven't already, unzip SciLor's downloader and run it.  Go to the Extended Functions tab, and select Import from file.  Browse and select the text file that was previously generated and click Search & Add.  You should've now been sent to the main tab with all of the tracks now neatly packed into your download queue.  Click download and wait for your songs to finish.  You'll be able to find them in the Downloads folder in the program's directory.


Note: if this program batch searches too many titles in short amount of time ( > 200), I've had GrooveShark temporarily IP "ban" me for about six hours.  That means you'll be unable to use this downloader and you won't be able to search or play songs on their site for the duration of the block.  200 search queries in under a minute is not only suspicious, but it's not nice to their servers.   I recommend batch searching half, waiting a few minutes, and then doing the next half.  To do this, copy half of the list from the text file and paste it into the batch download field rather than importing it.


That's all.  Overwhelmingly simple, isn't it?

EDIT: Due to the new revamped 8tracks site, the script used in this post will no longer work.  Instead, try using this: http://8trackshelper.appspot.com.  (try my username: technix1).